
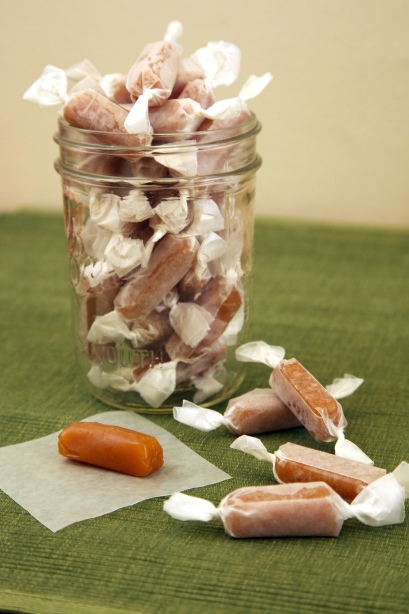
I am never a fan of caramel. I skipped all caramel candies, and caramel sauce. But when I saw this caramel recipe, I knew that I have to try it! I felt in love with apple cider a year ago when I first tried freshly pressed cider. It was nothing like the apple juice that you buy in supermarket. It was intense and fresh. Now when I see anything apple cider, I kind of go crazy. And these apple cider caramels didn’t disappoint me. The candy was packed with apple flavors, and the sea salt balanced out the sweetness. I am giving out these candies along with some chocolate chip cookies to families and friends for the holidays. I hope everyone will enjoy them.
Apple Cider Caramels (Adapted from Smitten Kitchen)
65 – 75 candies
Required tools:
– candy thermometer
Ingredients:
– 4 cups apple cider
– 1 cup sugar
– 8 tablespoons unsalted butter (cut into ½-inch cubes)
– ½ golden brown sugar
– 1/3 cup heavy cream
– 1 teaspoon sea salt
– vegetable oil (for knife)
– wax paper for wrapping
Directions:
- In a 9 x 5-inch metal loaf pan, line the bottom and sides with 2 long sheets of crisscrossed parchment papers. Set aside.
- In a medium saucepan over medium-high heat, boil the apple cider until it has reduced to about 1/3 to ½ cup in volume, about 45 – 60 minutes. Stir occasionally. The cider should turn into a dark and thick syrup. The liquid may be foamy close to the end, turn down the heat to medium if necessary.
- When the cider is finished reducing, remove from heat. Stir in the sugars, butter and heavy cream with a spatula. Attach the candy thermometer. Return the pot to stove and cook over medium-high heat until the mixture has reached 220˚F, about 5 minutes. Add the sea salt. No need to stir. Cook until the mixture has reached 252˚F. Remove from heat immediately. Pour the caramel into the prepared loaf pan. Stir the caramel to mix well. Let it sit at room temperature for at least 3 hours.
- Meanwhile, prepare the wax paper for wrapping. Cut the wax paper into 4 x 4-inch squares. Cut about 75 squares.
- Prepare two big plates with wax paper covering them. Set aside.
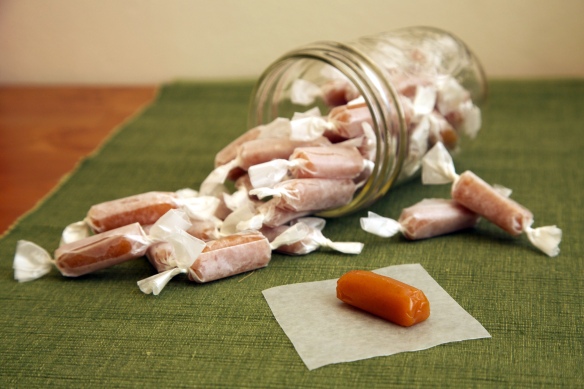
- When the caramel is set, transfer to a cutting board. Use a well-oiled knife, cut the caramel into 1½ x ½-inch rectangle candies. Oil the knife after each cut if needed. Place the candies on the prepared plates while cutting the others. Make sure the candies do not touch each other. If they stick together, it will be hard to separate.
- To wrap the candies, place a candy on a wax paper. Roll up the wax paper around the candy, and twist the sides to close.
- For storage, keep the caramels in an airtight container for up to two weeks. For a soft texture, keep them at room temperature. For a chewy firm texture, keep them in the fridge.
Tips:
- It may not be easy to find freshly pressed apple cider. I actually used Trader Joe’s Flash Pasteurized Apple Juice. It had a dark brown color. It may not be the pure apple cider, but the flavor was close enough. It can be found in the fridge isle in Trader Joe’s. I think the apple juice that is yellow and clear (in juice isle in supermarket) may not be good enough. The flavor is not the same.
- I used a loaf pan, but you can use 8 x 8-inch metal square baking pan. It really depends how you want your candies to look like.
- When making the caramels, keep a close eye on the thermometer. Things can change really quickly.
- To cut the wax papers, I used a paper trimmer. It was much faster and made perfect edges.
Source: Read

I’ve only ever tasted shop bought caramels and can only imagine how delicious apple cider ones must be. If only I can get over my fear of boiling sugar!
I have never tried homemade caramels before this recipe too! The unique flavor from the apple cider makes this caramel different and delicious! I know what you mean about scared of the boiling sugar. I was too at the beginning. I tried to stand way back away from the stove. But when the sugar mixture was only boiled for 5 minutes and it didn’t get too bubbly, I ended my worry. Hope you will get over your fear too, Michelle!